Feature Update

24/09/2024
Exciting news! We've released an overhauled version of Creator Email Automations on Reacher! We've received valuable feedback from customers on their experience with the first edition of Email Automations. With email automations you can send messages with content not allowed on TikTok Shop such as links, special deals, off platform community invites and more! This new feature offers you a powerful second point of contact through email bypassing creators' crowded TikTok Shop inboxes. Continue reading our Blog post to learn more!
Exciting news! We've released an overhauled version of Creator Email Automations on Reacher!
You can watch this quick demo video or read the release notes below:
We've received valuable feedback from customers on their experience with the first edition of Email Automations. With email automations you can send messages with content not allowed on TikTok Shop such as links, special deals, off platform community invites and more! This new feature offers you a powerful second point of contact through email bypassing creators' crowded TikTok Shop inboxes.
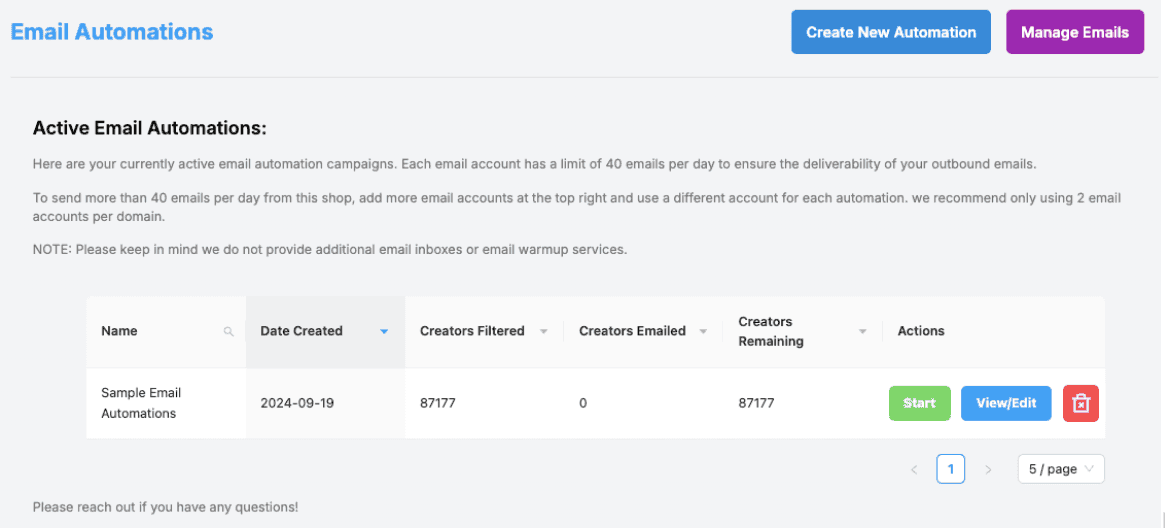
Main Hub of Email Automations
After signing in, you'll land in the hub where you can:
Start, stop, view/edit, or delete your automations.
See the number of creators filtered, emailed, and remaining.
Access buttons to create new automations and add email accounts.
Email Accounts
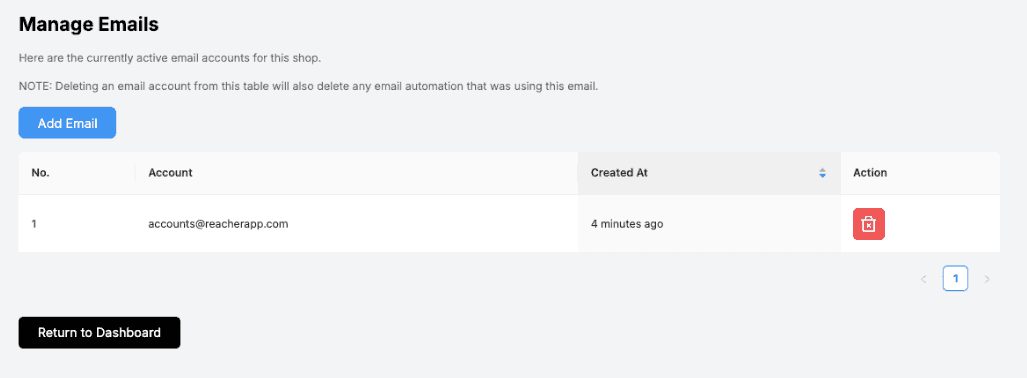
Instead of having one email account that is used for all automations within a shop, we now allow you to add Multiple Email accounts.
Hitting Add Email will ask you to Sign-In with Google. Make sure to select the option “Send Email On Your Behalf”, otherwise your automations will not work.
When you delete an email, any automations that are tied to this email will also be deleted.
Restrictions On Email Accounts
Each email account will have a limit of 40 emails per day in order to ensure the deliverability of outbound emails.
Every automation is tied to ONE email account. This is the account that all emails for this automation will be sent from.
Every email account can be tied with at most 1 automation.
Since we are allowing multiple email accounts, you are now able to run multiple email automations in parallel!
Creating an Automation
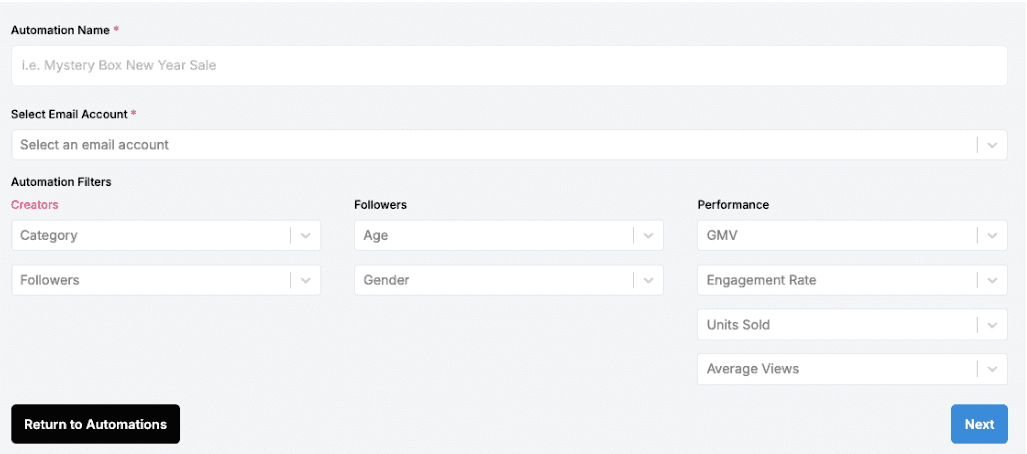
Step 1: Enter an automation name and select filters to choose creators from our 90,000+ email database. Filters resemble those in TikTok automations. Here you will also need to select an email account that will be used. The dropdown will only present emails that are not used by any automations.
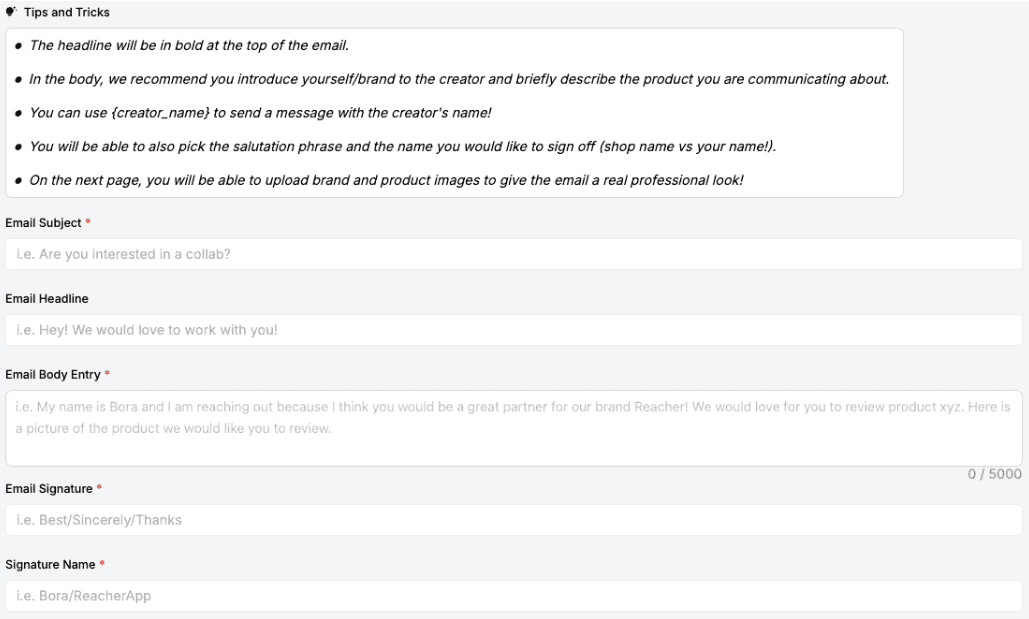
Step 2: Customize your email content: subject, headline, body, signature, and name.
(Optional but recommended) Step 3: Add two images: a brand image (top/bottom of the email) and a product image (between body and signature).
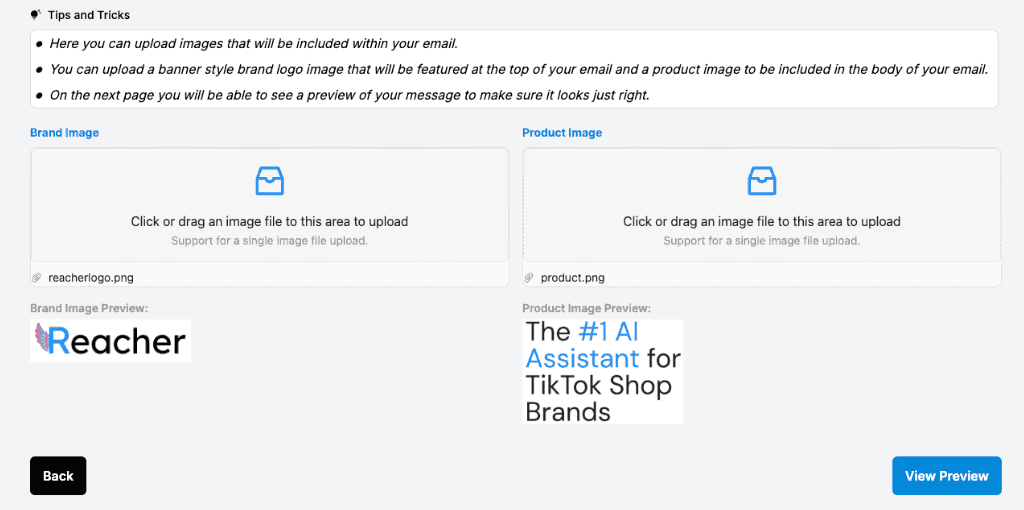
Preview your email before finalizing it—ensuring everything looks just right. Hit Finish and Save to complete the automation.
Managing Automations
There are two buttons to manage your automations:
View/Edit: This will bring up a summary of the automation including the email content, filters and images you selected. If you would like to edit the automation, there is an edit button that will bring up the creation pages again, but this time with the options you have previously selected so you can make the changes you want.
Delete: Just hit the red delete button.
Note: that if you delete an automation, it will be gone forever.
Deleting an automation will untie the email that was used to create it so that it can be used for future automations.
Running Your Automation
In order to run your automation, hit the green Start button and you will see it kickoff. As soon as it starts, you should see the number in the table increment by 1. This signifies that an email was sent! Emails are also spaced out by 1 minute so if you refresh the main hub page of email automations after about a minute, the number will have increased by 1 again.
Note: Unlike TikTok native automations that can be scheduled, email automations need to be manually run everyday in the portal.
Monitoring Progress
There are three ways to monitor your automation:
Table of automations: Periodically refreshing the page when an automation is running will show the updated count of emails sent.
Note: This is a count of emails sent by this automation ALL-TIME, not just for that day.
Main dashboard: Just like there is a tab to check the messages sent to creators, you will now see a new tab labeled “Emailed Creators”. Here you will be able to see the name and email of the creator contacted, along with the email automation that it was sent by and the date sent. Hitting the small plus sign will show the content of the email sent. Note: the content shown will only be text, no images. On this dashboard you will be able to filter and sort emails as well. Additionally, you will be able to download an Excel file of all emails sent.
Sent folder: You can also monitor emails to creators via the sent folder in your email inbox.